Hello all! Just so my few readers know, I’ve created my own official webpage, Huckleberry-Hollow. I will be posting everything there from now on. Hope to see you there!
Autumn Dress: Part One
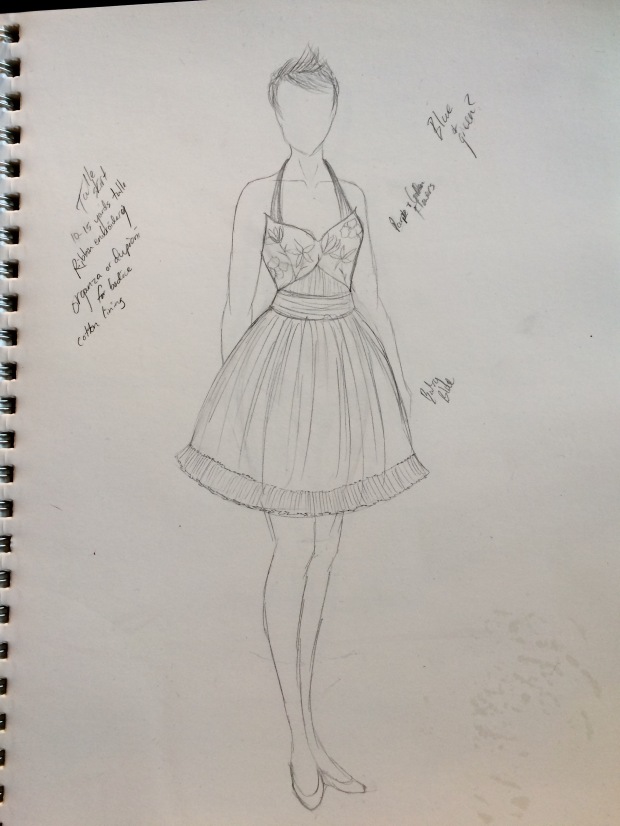
Being immersed in all of that powerful, black satin and organza for Queen of the Night, I began to grow a little restless. I wanted to work on something different; to look at fabrics that were rich in color and give myself a different, smaller challenge. I decided to create something that would still hold that whimsical touch of fantasy that I love while also remaining practical in use. I had a design in mind from over a year ago and, since it was originally a summer dress, I thought I would re-imagine it as an autumn dress. Here is the original design; the idea being that it would be made mostly of tulle with a muted, ribbon-embroidered bodice for the point of interest.
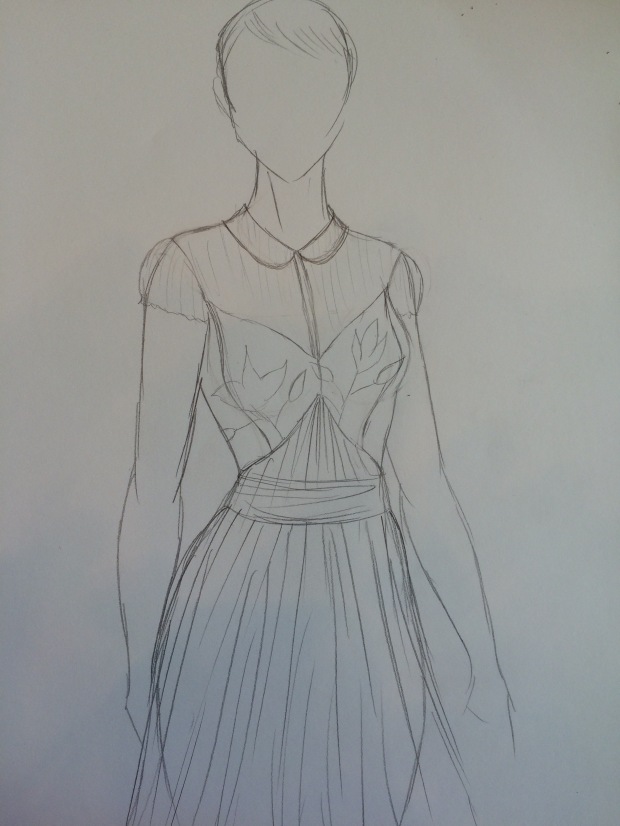
When I ended up at Joann’s to pick out fabric with my sister on the phone, she gave me the idea of changing this spring design into something more suited for autumn. Katie , my wonderfully talented and amazing sister, who created this , along with so very many other things, tugged me in to an early anticipation of one of my favorite seasons; fall. Pumpkins, autumn leaves, cranberries, apple cider, and whispers of crisp, cool air. In Montana, fall comes much earlier and you always have a jacket on hand, whereas Oklahoma fall is… much warmer. But it cools off a lot when compared with summer, that is for certain! The air is no longer heavy, hot and dry. The wind causes those brightly colored leaves to tumble through the air and blanket the ground in rich reds, oranges, yellows and golds. The autumn season is so lovely and so inspiring! So of course I just had to alter the design on a whim and make myself ready for the coming season!
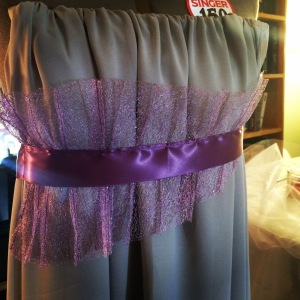
I decided to go with a mossy green for the bodice (which would later be embroidered with autumn-inspired organza ribbons–this is also my first embroidery project. I am definitely the ‘learn-as-you-go’ type) and found a warm, cranberry wine chiffon for the skirt and upper portion of the bodice.
I was so excited to start something new again! And, taking a cue from doxiequeen1 , I titled this my ‘procrastination project’. I admire this idea very much, because I’m a huge procrastinator and this way, even though I’m technically procrastinating on a much larger project, I’m still getting work done. Also, sticking to my vow of doing things the proper way to the best of my abilities, I began by drafting a bodice entirely from scratch. I pinned and pulled and draped some leftover black cotton from Queen of the Night on my dress form, drew out the shape I wanted in yellow chalk ( I use this fantastic little chalk pen that’s excellent for pattern drafting) and then cut out the shapes. I then pinned those shapes onto first the moss green silk and then the cranberry matte fabric. Yes, yes I know I sort of skipped a step. You should most definitely create a mock up of your drafted pattern just to make sure the thing actually fits and lays the way you want it to. I was, however, very confident with my drafted pattern and gave myself a 1/2 inch seam allowance.
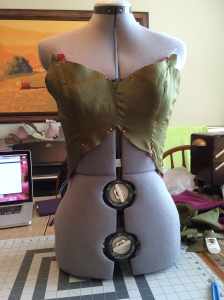
I then proceeded to pin every piece together with as many pins as I needed to ensure the curve of the bust would lay exactly right when I would sew it all together. The matte fabric (not really sure what it’s called) has enough weight to it to provide the structure I would need to line the extremely lightweight, moss colored silk. Yes, this is my absolute favorite color of green.
So many pins!
Anyway, after I finished sewing the bodice together, I made boning casings for my polyester boning that would be inserted into the lining of the bodice. I’m not a very big chested woman, and I only needed to add a bit of structure to the bodice so that it would stay where it needed to, so I did not use steel boning. In my opinion, steel boning is for real corsetry and is very helpful when working with large-chested women. But as for now, while I’m making garments for myself, I’m happy to stick with the cheap stuff. Besides, this dress will have sleeves when I’m done with it, so the polyester boning was used mostly for my own peace of mind. I think it helps shape the bodice really well, and for this design, I believe it to be necessary.
Inserting boning into the boning casings is probably one of my favorite things to do! I think it’s just because I used to do this the hard way; I would measure out the pieces and then try to sew them in underneath the seam allowances! Let’s just say that not knowing how do things the proper way really makes things unnecessarily difficult. This way I can just slide the pieces in! It is so much easier.
I’m so happy with how this is turning out, the shape is exactly how I pictured it in the drawing!
After this, I decided I should get working on the chiffon skirt. I decided to make it a circle skirt and cut the lining out of the mossy silk. I gave a few extra inches to the waste-line of the chiffon section so that I could gather it a bit at the center to achieve the same look I had in my drawing. I must say that I absolutely love my roll hem foot. Once you figure out just the right way to guide the fabric through, it works fantastic for hemming chiffon, cotton, and other lightweight fabrics. I find it works best to guide the fabric through at a slight angle, keeping it from sliding all the way underneath the right side of the foot.
I’ve also created a bunch of bias tape from the silk as well, to bind up the edges on the bodice and waist of the skirt.
The roll hem foot works so well, and adding a contrasting top stitch is a special little detail that I like to have in all of my pieces.
Oh yes! I also got a little fancy and used a french seam on the chiffon skirt, which makes everything nice and clean looking on the inside and out! Also, I’ve learned that it’s normal practice to use a french seam on sheer fabrics and it is actually a fairly simple seam to learn.
Well, that’s it for today, come back next week for Autumn Dress: Part Two to see how I did the ribbon embroidery!
Queen of the Night: Part Two
I know it has been rather a long while since I first posted about this project, but I have gotten so much done! I just haven’t taken the time to show all of you ( wah wah). Let’s just say that this whole project has been a huge learning process for me. I swore after the bridesmaids’ dresses that I would try as hard as I could (and as best as I know how) to do everything the proper way. No more shortcuts, no more cutting corners, and so far I have done a good job–I think. So, after I finished the feathered bracers Jeff and I were suddenly swamped with packing all of our belongings into boxes. It wasn’t until two weeks later that I could take up my project again and then I was able to do all of my sewing and draping and designing in this big dining room with these gorgeous lattice windows! It is such a pleasure being able to work in the sunlight. I feel so inspired to accomplish more and more simply because I’m able to see the outside world!
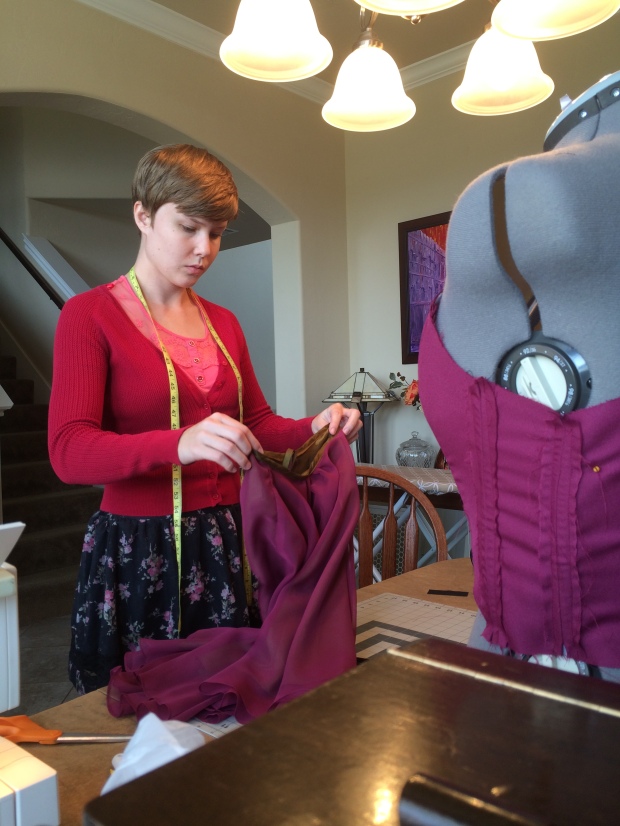
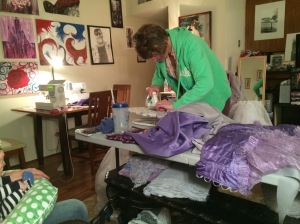
(me working on my procrastination project for autumn)
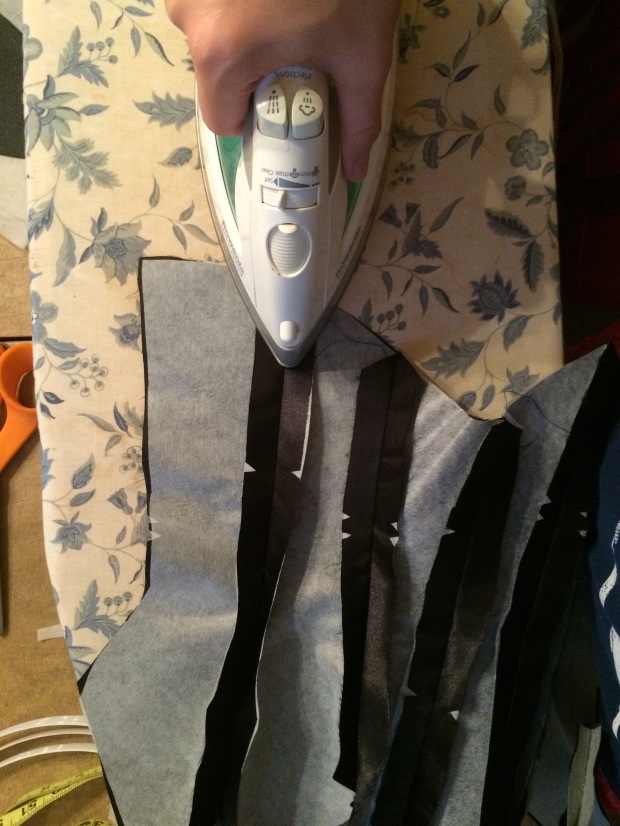
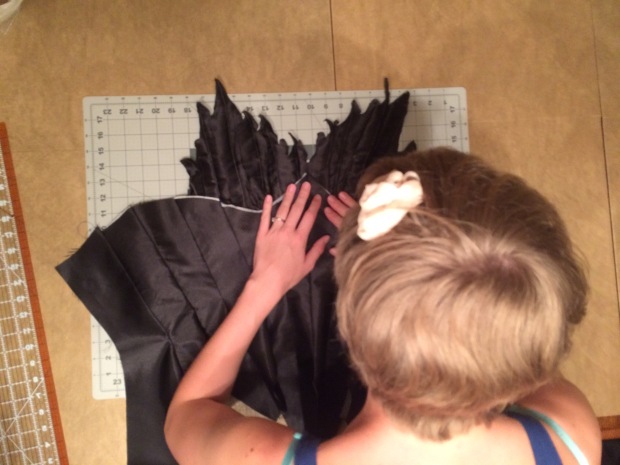
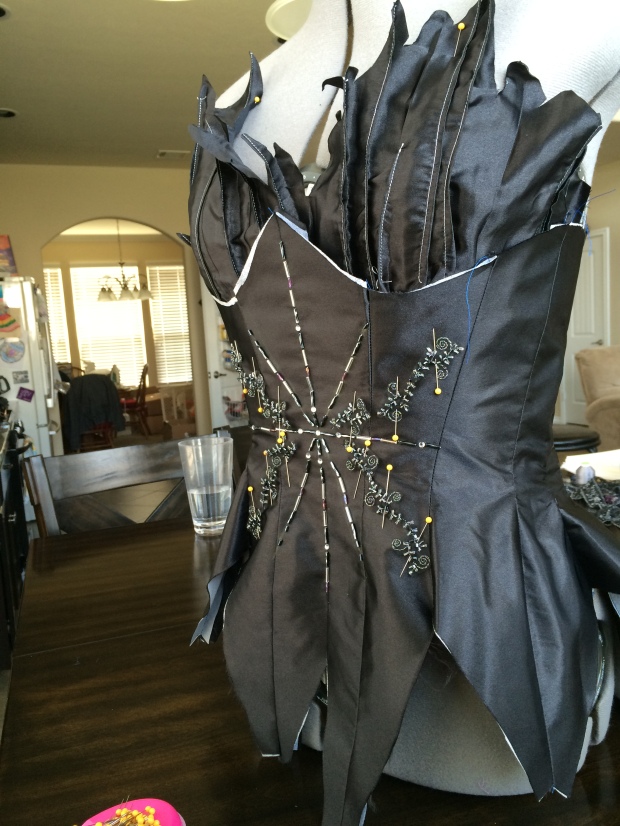
Anyway, having already drafted the bodice pattern, I began to cut out the lining and satin for the bodice. I then gathered together a rectangular section of satin with two rows of basting and steam-ironed the gathered pleats to help create a cool texture, and added to that with some pin tucks in a nice silver-gray colored thread. After I had achieved the texture I wanted, I pinned the rectangular piece to my dress form and cut away a jagged edge at the top of the bodice to achieve that sort of fiery look found in my drawing . After applying some lightweight interfacing to the main body of satin, I sewed all of the pieces together (yes, pinning carefully beforehand) and soon I had a pleasant idea of what the bodice would really look like!
Oh yes! I also burned the jagged edges I had cut to prevent fraying and it also adds a cool effect!
This was about the time that I started working on Addison’s fairy princess dress , which took about two days to finish. I mentioned in the first post that I would maybe consider trying my hand at some beadwork for this project and well, the inspiration whisked me away into an unfamiliar land of hand stitching and beading!
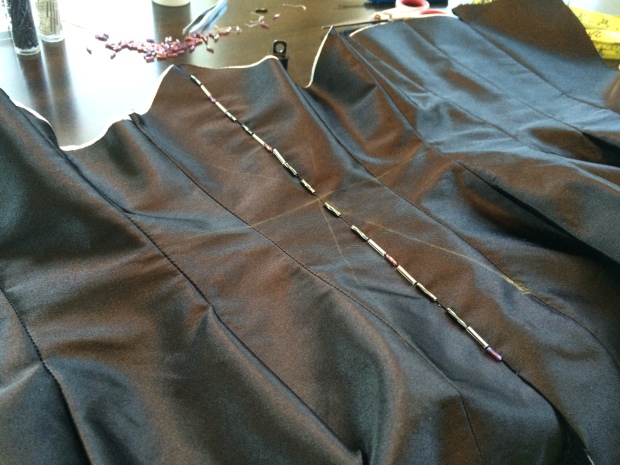
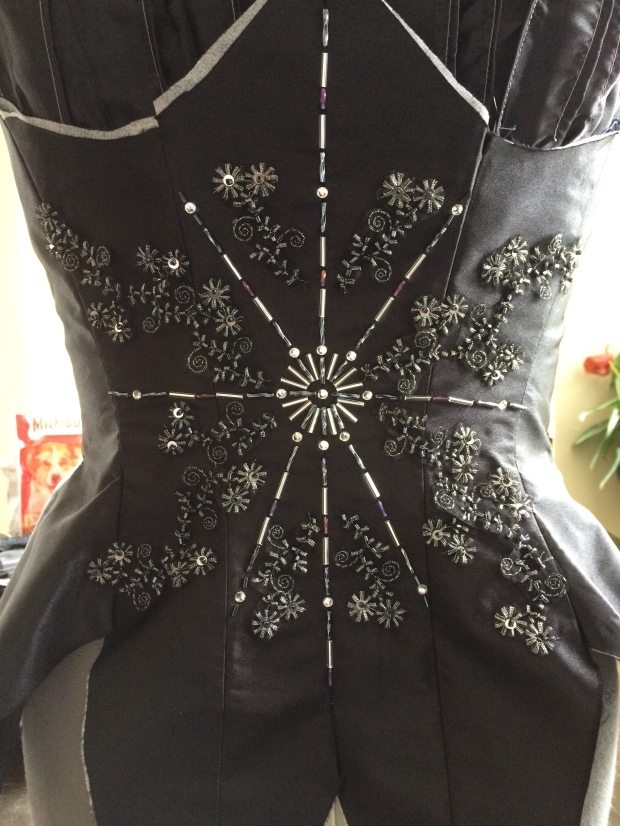
I began by doing a few practice designs on paper, then once I decided on one that I liked, I drew an outline in chalk on the bodice.
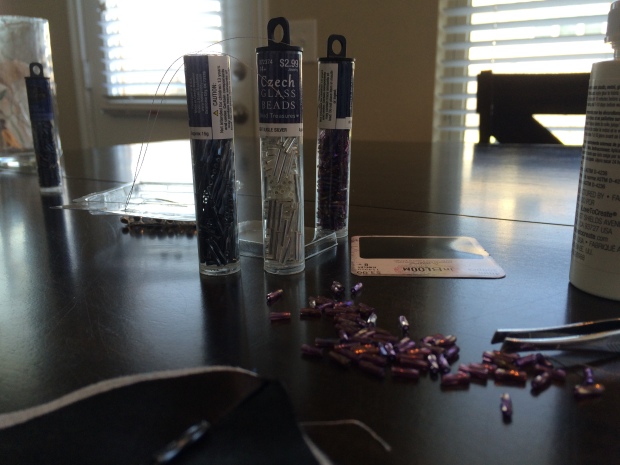
The pencil lines were drawn just so that I could see the over all shape of the star. Also, I figured some sort of star pattern would be very appropriate for the Queen of the Night. As with most of my designs, this sort of evolved into something bigger and more beautiful ( in my opinion) as I worked on it. I chose gun metal glass beads, small rhinestones, crystal beads, and some iridescent purple glass beads for the design. I realized after I had stitched a couple of beads down that I probably should have measured everything before applying anything. I’m not very good at remembering to do those important things when I’m in creativity mode.
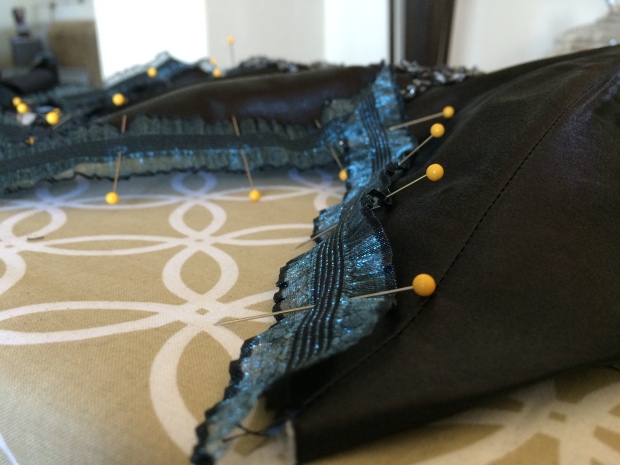
I had also purchased this really gorgeous beaded lace trim that, at the time, I knew I just had to have. I just wasn’t sure what I would use it for. After beading more of the star pattern, I figured out a way to incorporate the beaded lace trim.
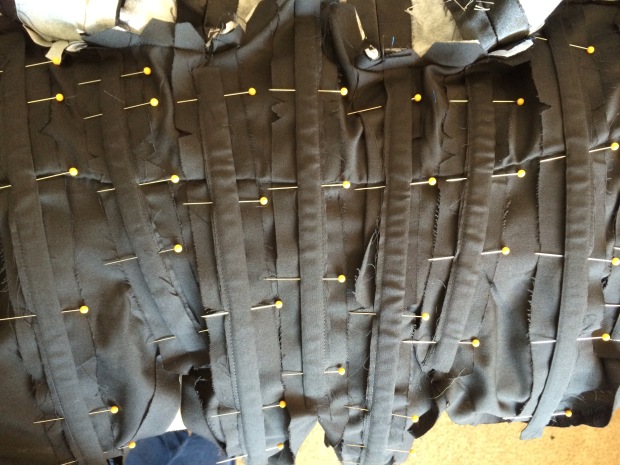
Also, since I never really crafted an actual draft of the bodice, I realized, after sewing everything together, that I really needed to fix the line of the slightly dropped waist. I had originally finished everything except for the lacings, but I just had to rip out the trim and bias tape because the waist line puckered all over the place. I had hopes that maybe with the gathering and pleats that go into the skirt, it might help fill out that dropped waist, but alas it was not so. It turned out to be very good practice for me as I unstitched, smoothed out and re-pinned the entire bottom half of the bodice. Thankfully I did not have to fix the very front with all of that bead work!
I also realized that I probably should have sewn the boning casings into the bodice before inserting the polyester boning, buuuuut….. oh well. It still worked! Although it was more difficult.
It now fits perfectly around my waist and hips! And the blue trim is gorgeous!
Fairy Princess Dress
So much has happened in this past month that has prevented me from sitting down at the computer and sharing with all of you what I’ve been working on. I will simply start with the biggest news first; we are no longer moving to Colorado. That said, we’ve been looking for a small house to buy and turn into a rent house while we remain in Oklahoma for this first year before I may (or may not) begin my master’s degree in Colorado. In the mean time we thankfully have a place to stay with an abundance of room to work on projects. So, on to more sewing-related things!
As I was working on the bodice for my Queen of the Night costume (the progress will be posted at the end of this week) My new little niece, Addison, became very attentive to all of the little things I was doing with the fabric and pinning and gathering and trimming and–well, you get the picture. She absolutely loved the embellished organza I picked for part of the skirt that I had draped across the table and began talking about how she wanted a ‘fairy princess Barbie dress’ in the same fabric, only pink. Then she went on to gush about how she wanted the skirt to look like flower petals and a big purple sash in the middle and sparkly, glittery wings the color of cobwebs. All the while I was thinking, well, wouldn’t it be nice to make something fit for a little fairytale princess? I knew her birthday was in just a couple of weeks and thought a ‘fairy princess Barbie dress’ would make the perfect surprise! So, Jeff and I stopped at Joann’s one day and picked out various shades of pinks, purples and a lovely gold glittered, spring green satin.
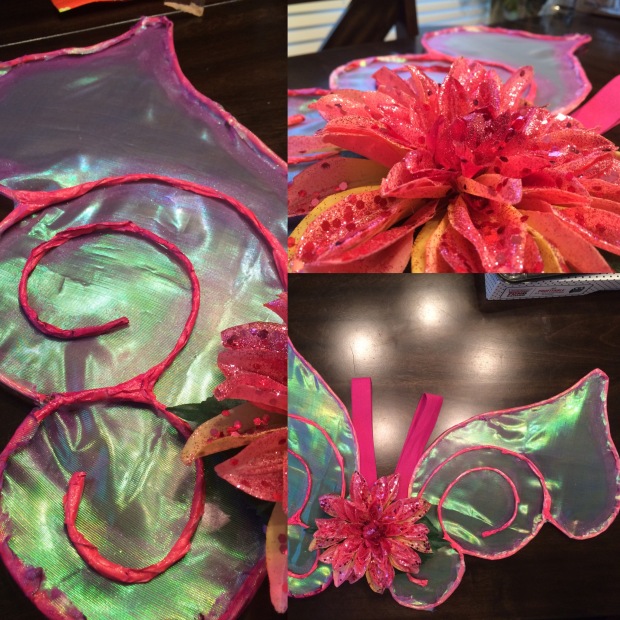
Jeff made the wing frame out of a couple of wire hangers, then covered them with tape and painted them pink and a clear iridescent color.
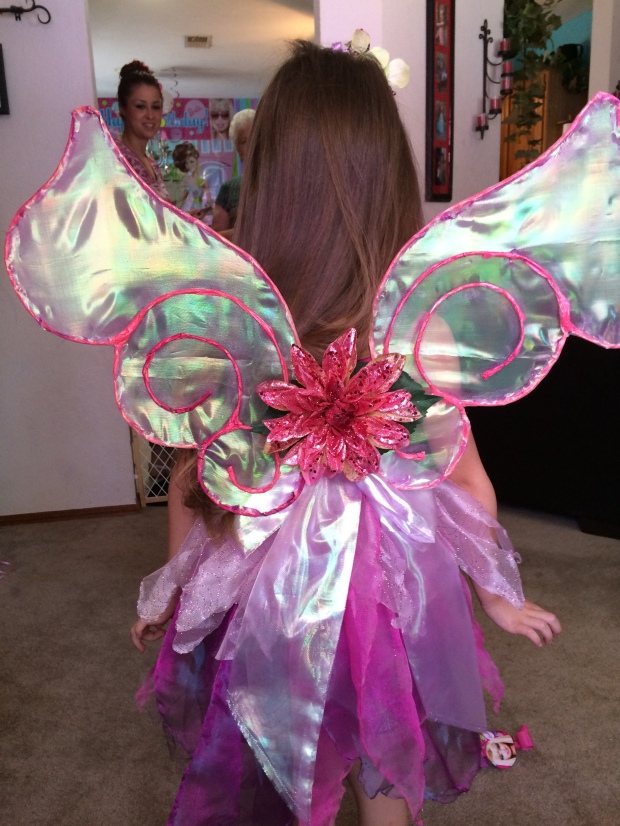
I then covered the wings with this iridescent organza that I could swear was spun from real pixie dust.
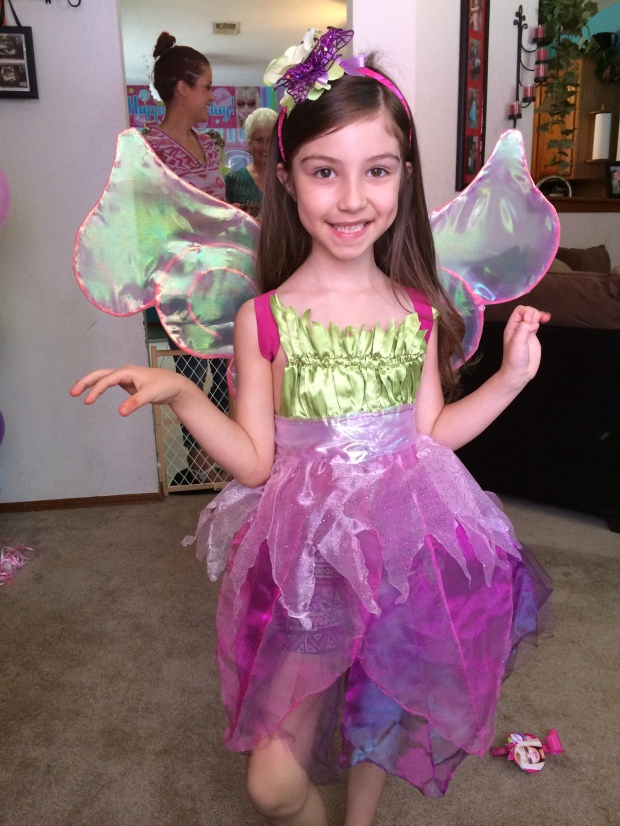
I decided for the dress, it would be easiest for me (and Addison) if it was made in an apron form. No zippers or buttons to mess with when playing dress up and less trouble for me! I wanted the dress to reference a flower as much as possible, so I gathered and pleated the bodice in the green glitter satin, then Jeff and I went on to cut out flower petal shapes with the various pieces of organza we purchased. I used a dark purple tulle for the bottom layer of the skirt so she could get away without having to wear pants. I wanted to create a sort of ombre effect from the purple to the light pink because when you look at a flower, they tend to have richer, darker shades in the centre while lightening up at the edges.
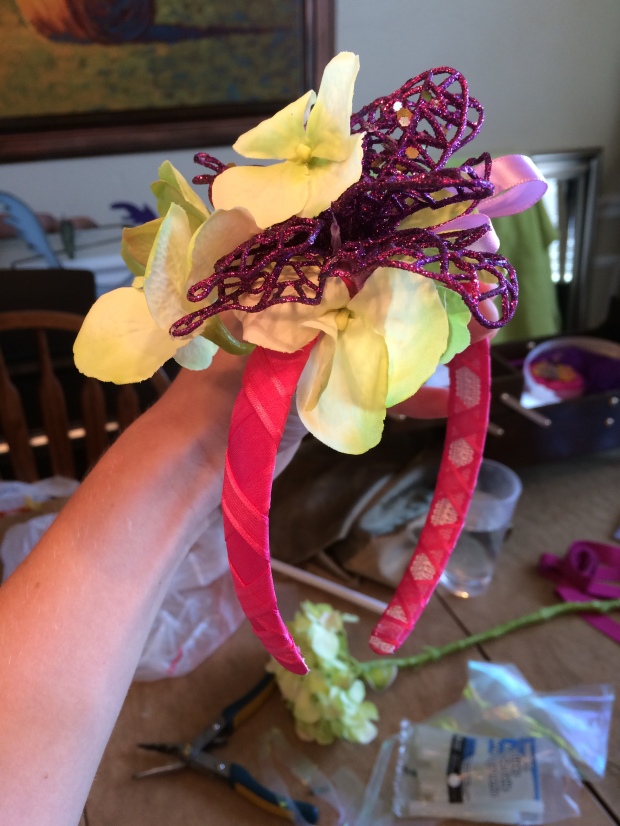
And of course, since this is a fairy princess dress, she needed to have a crown of some sort. So I wrapped this pink headband in ribbon, attached a glittery purple butterfly on to it along with some soft green hydrangea blossoms.
The end result was so magical! She was so excited to put it on before her party and even ran through the living room, jumping in the air so she could ‘fly’ with her wings on. (apparently she won’t take the thing off and even sleeps with it on!)
Isn’t she adorable?!
Next Week: Queen of the Night: Part Two
Queen of the Night: Part One
In the endless effort to improve upon my design and sewing skills, I have decided to create a costume for The Queen of the Night from Mozart’s Die Zauberflöte or, The Magic Flute. I’m very excited about this costume because, though I know I will never be able to sing Der hölle rache at least I can dress up like her for Halloween or… something… Sopranos get to sing so many fantastic arias. Don’t get me wrong, I love my Mezzo arias too, but let’s be honest–the mad scene from Lucia di Lammermoor? That scene is so chilling and so beautiful. Not to mention Casta Diva–anyway, on to the costume!
I have decided I need to start making my blogs a bit more detailed, well, much more detailed because though I may not know all of the technical terms for what I’m doing, it might help to show anyone reading this what exactly I think it is that I’m doing and perhaps get some good pointers and advice for improvement? Yes? Please? That would be greatly appreciated 🙂 Keep in mind that constructive criticism is what I’m looking for. I’m not particularly interested in name-calling or trolling. First of all, it is a waste of your time and mine. Second, you’ll be making yourself out to be a little 3rd grade bully, and third… well, it’s just unnecessary. Anyway, enough of that.
I began sketching out a concept design and then moved quickly on to sketching out the details that would help me draft a corset pattern, fingerless gloves (later to become bracers) and where exactly I would be attaching feathers. Yes, feathers. Haven’t you ever wondered what the Queen did with all of those exotic birds Papageno captured for her? Well, I did and figured that she might enjoy having them killed and plucked for her own personal vanity.
 I went on to search for peacock feathers but, not wanting it to look like a peacock dress, found some iridescent black rooster feathers as well. These compliment the peacock feathers nicely and help bring out the greens and blues. I’ve also bought the base materials for the bracers, skirt and part of the bodice (still making a few more color decisions so that it’s not just black everywhere as is traditional for the Queen of the Night). I’ve gone with a stardust embellished organza and black taffeta for the skirt. As for the bodice and bracers, so far I have a black poly satin. My budget for this dress is 100$, and so far I’ve done my best to stay below that budget. Though I did get some extra birthday money so…
(I definitely prefer my colored illustrations to just the pencil sketches, but this will do)
I began by measuring out the length I desired and, wanting the ‘fingerless gloves’ to fit snug and stiff, I decided to make them into more of a bracer style, lacing them up along the inside of my arm. I am very much a figure-it-out-as-I-go type person and inevitably learn by trial and error. I believe this does make the process much slower in comparison to the professionals, but hey, I’m learning! So, I took some scrap fabric from a skirt I made a couple of weeks ago and drafted the pattern I would be using for the bracers. As I stated in my previous post, I am determined to work on doing things the ‘proper’ way and be much more thorough in constructing my designs. So, in this draft I gave my self a healthy sized inch 😉 for the seam allowance and pinned it together according to the circumference of my wrist and arm, accounting for bending and flexing as well. As I tried it on I decided that I would much rather go with the bracer idea than fingerless gloves. I should probably, in the future, draft a pattern with scrap and then transfer that to paper or vice versa rather than just simply working by chance, hehehe 🙂
I was finally ready to cut out the cotton lining and poly satin! Huzzah! I played around a little bit with the trim and feathers that I had purchased and decided to cut the top of the sleeve at an angled point to best achieve the look I wanted. Also, I thought the blue trim would work best against the iridescent black feathers.
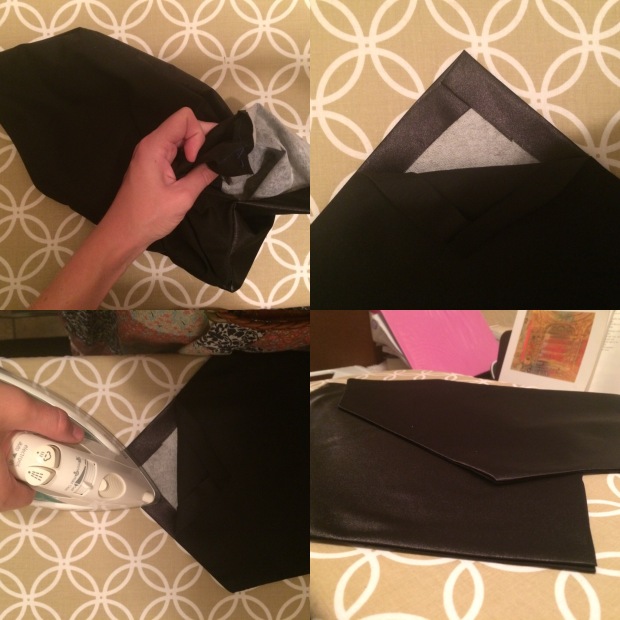
After that was finished, I began cutting out the lightweight interfacing that I would iron on to the poly satin in an attempt to make the bracers look as smooth and stiff as possible. The directions do say to pin it on first and iron the edge, but I found this to be mostly ineffective. They also say to use a damp cloth to iron the full piece, but that didn’t really work so I just steamed it a bit with my iron and it sealed into place just fine.
As I said, I’m trying to do things the proper way so I’ve been pinning like crazy. From mistakes I’ve made in the past, I’ve decided the more pins used, the better fit. Of course, after I finished pinning everything together and sewing it all neat and such, so very proud of my work–I saw that I had sewn the wrong sides of the fabric together and had to rip it all out and start over. I can be kind of scatterbrained at times (although White Collar was playing in the background; Matt Bomer’s blue eyes and all) But I fixed it quickly and all was well 🙂
At long last I was ready to turn out the sleeves and iron out the seams, I left the top open so that I could fold the raw edges inside and simply top-stitched it closed. At this point, I’m still trying to do as little hand sewing as possible until I get in to beaded work and stitching. I will machine sew whenever I can because it saves a lot of time and looks much cleaner than my (at the current time) sloppy hand. Also, for these two pieces, the top-stitch will be covered with feathers and trim. Oh yes! I also trimmed a few notches in the corners to reduce bulk at the seams. Don’t the edges just look so neat and clean?!
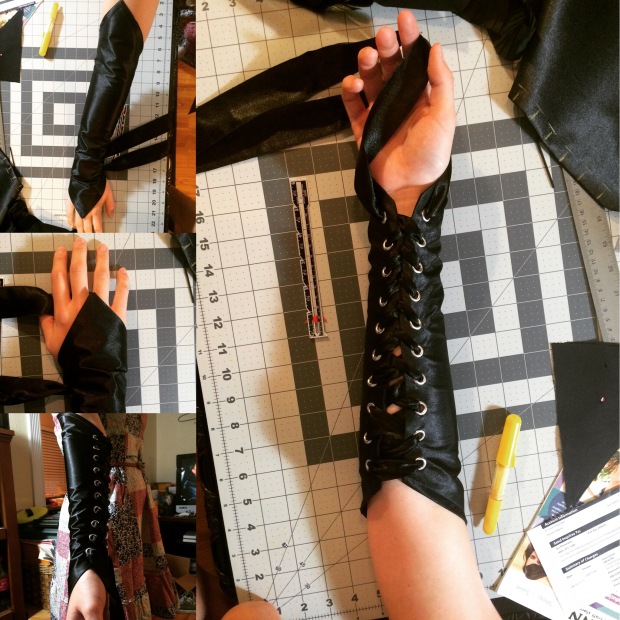
Before attaching the pretty details, I figured it would be best to insert the grommets. Again, trying to be thorough I actually measured exactly where each grommet would be placed! Aren’t you proud of me?! Growing up as an artist and purely creating things from my imagination, I tend to forget that measuring will make things much easier and usually better looking than simply eyeballing your work. So, I’ve placed each grommet center at an inch apart.
It was time get out my new tools! I’m hoping to purchase a real hole punch set, but at the moment this anvil and hammer will do nicely. The holes turned out so clean! Much better than my first lace up bodice from the masquerade gown where I (now rather embarrassed) cut slits with my scissors instead of real holes. Oh! And don’t worry, that’s an old car magazine, so it has been thoroughly looked through 😉 The Toyota Supra concept literally makes me drool.
Using a hammer and anvil I attached 10 smooth, silver grommets along each side of the bracers, so 40 total. At this point, I just had to put in some ribbon and lace them up to see! Don’t they look just wicked?! Punk rock star, anyone?
Unfortunately, I forgot to take pictures of how I attached the feathers and trim, but I promise that I did pin everything before I sewed anything! First, I pinned the black, pleated ribbon trim and on top of that went the shimmery blue and black ruffled trim and then I slipped in some feathers underneath of the trims to hold them in place. I then top-stitched over first the blue, then down the middle of the black trim and here is how they turned out! I must say that I am very please with how this project is going.
The Wedding: Part 2
A shout-out to one of Oklahoma’s newest (and most impressive) photographers out there; McKenna Sanderson. Yes, she took our Wedding Photos and they are absolutely fantastic. The link will take you to just a few photos to kind of give you an idea of how perfect everything was and how beautifully (though at times slightly chaotic) it all came together.
The week of the wedding was busy, to say the least 😀 My mother, sister and I spent the first 4 days (including most of Sunday) to finish up the bridesmaid dresses, while Jefferson painted these lovely wedding signs to show people where to go.
He also got his guys to help put up the lights, the arch, and get a hold of enough chairs and tables. Our original plan was to have the wedding outside, but due to the amount of flooding there had been in Shawnee, we had to move it indoors. It was really perfect, actually, because every day leading up to the wedding was kind of rainy and humid, but when it came to the day of the wedding it was like the entire sky cleared away and there was nothing but sunshine and blue for miles. We still ended up keeping it in the barn though because the ground was too boggy out where we had originally planned everything.
And so it came to the day before the wedding, the rehearsal dinner; my dad was arriving by car from Montana with a very tired Michael in the back seat (he’s six) and our old family friends that I hadn’t seen since I was 7 years old had come all the way as well! Naomi had generously offered to do my bouquet and help with the rest of the flowers–which was perfect because she helps run her sister’s flower shop, how much luckier could we have gotten?! My lovely groom, faithful bridesmaids, our wonderful groomsmen, and fantastic family all helped that day with hanging lanterns from the ceiling, draping drop clothes from the rafters to hide the tools along the wall 🙂 hehehe and hanging lights in such a way as to resemble the Assassin’s Creed emblem… lol wasn’t planned, but it added the perfect, subtle amount of geekism to our wedding 😀 (I am a HUGE AC fan–that’s an understatement) That night, a couple of my bridesmaids and I stayed up to decorate flip flops and put our hair in pin curls. I’ve got to share this next picture of my nephew, after running around with me and his mom all day 🙂 Isn’t he just adorable?! Wedding planning is hard work.
I arose bright and early the next morning, butterflies in my tummy, my heart strings playing a merry tune and crawled into bed next to my mom, asking about what else needed to be done before 7 that evening! I then got up and fixed the tulle/hula-hoop chandelier, hung my firefly mason jar lanterns outside and then proceeded to make some of the most epic playlists (and trim my flowers). The first was to be played as everyone was finding their seats, and it began with the theme from Star Wars, Concerning Hobbits from the Fellowship, Game of Thrones and a few pieces from Legend of Zelda: Ocarina of Time. I did add some stuff from Pride and Prejudice at the end just to sort of smooth the transition into the processional, so the guests weren’t completely shaken out of their seats 😉
And so I walked down the aisle, my best and truest friend that I hadn’t seen since she moved away our Freshman year was there to carry my train for me. Liz on Top of the World was playing in the background and suddenly all I could see was my Jefferson. It was perfect.
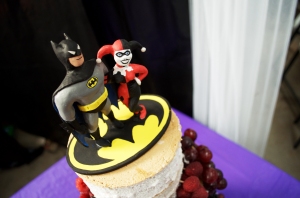
Oh! Just a note about our wedding topper; I am fully aware of how the DC Universe works and how much Harley Quinn despises Batman, however, Jeff and I met at a Halloween party where I was dressed up as Harley Quinn, and later I discovered that the relationship between him and his brother is very much like 1970’s Joker and Batman; Jeff as Batman, Robbie as the Joker. So, we thought it would be a little strange to have Harley Quinn and Joker on top of the cake. A little confusing and backwards in DC Universe, but it makes perfect sense between Jeff and I, and that’s all that matters 😀
The Scarlet Dress
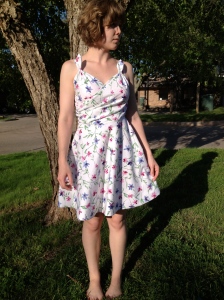
Hello all! Ah yes, the wedding and honeymoon is over (more on that next week), I’ve packed my entire apartment and moved it into Jeff’s very tiny apartment above this pizza place–yes, it does smell delicious in the hallway, most often of breaded mushrooms, YUM! It is so incredibly wonderful to finally be able to have our things in one spot! It has been a tight squeeze, but I won’t let that stop me from making a few costumes this summer before the move to Colorado. Yes, we are moving to Colorado so that Jeff can get a good job at a graphic design company and so that I can (hopefully) work with the costume department at CU Boulder, and then next year I’m all set to attend their vocal performance master program. Lots of things happening in the Bowman family 😀 hehehe I’m a Bowman now.
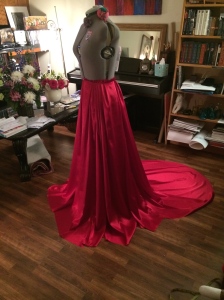
Anyway! I’ve finally been able to take a few shots of my recital gown and am very proud to share with you all the result! First, let’s go back to the beginning; I couldn’t decide between green or red, so I took a poll and everyone agreed that red was the ‘power dress’. So here’s my design (it evolved much from this)
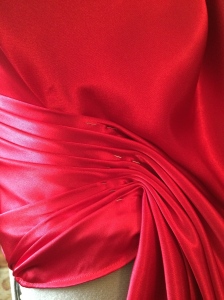
When at last the opera was over and I completed my preview, I was finally able to begin work on this gorgeous gown and this is how it went; first, I began pleating the skirt (yes, pride and prejudice was playing the background 🙂 )
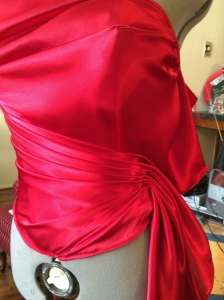
Then, once I constructed the base of the bodice, I went on to play with the draping.
It was so cool being able to just experiment with the folds and layout of the bodice!
After deciding I was happy with the pleats, I hand stitched each point–not entirely sure if that’s how the pros do it, but it worked for me! At last, I was able to try the thing on and it fit beautifully 🙂
And after all of that work I was finally able to get a few good pictures of the finished product!
For my actual recital, I had gathered the train in the back to make for easy movement, but I couldn’t resist taking out the bustle for the pictures! I cannot believe that I went from a simple 50’s inspired dress (with many MANY mistakes) to this ball gown over the course of two years!
Having no real knowledge of sewing to begin with, I’ve learned a lot through trial and error. With my mom and sister’s help for my bridesmaid dresses, I have also learned the ‘proper’ way of doing things and from now on I will not be taking anymore ‘shortcuts’ with my work. This dress took about 4 business days to complete, imagine if I would have had 14 business days, or more!
Next Week: The Wedding: Part 2
The Wedding: Part I
Hello all! Before I get into my projects, I’d like to share a personal note with my few readers:
After Jeff asked me to marry him, I told him that I didn’t care where we got married or what I would wear, or anything like that–all I wanted was to make him my husband, and to become his wife. So many brides get far too wrapped up in wedding plans that they forget the whole reason they’re planning a wedding. Its not about making each little detail perfect or having just the right kind of flowers or even having the ‘perfect’ dress. You’re making a serious covenant with this person (And, if you believe as I do, you’re making a covenant before God, which is kind of a big deal), you want to stand beside this amazing person for the rest of your life; you’re creating an equal partnership with this person that cannot be broken by anything. Having a wedding is just another way of celebrating your love and devotion to each other and sharing this sublime happiness with your family and friends.
Thankfully, we have so many wonderful, resourceful friends and family members that are making this huge celebration come together. We’ve decided on a budget of 1000$ with a little wiggle room of about 150$ (This budget does not include my gown–which is why it seems so unrealistic–because the gown was purchased by my mother a couple of years ago; that, dear reader, is a rather long and interesting tale for a different time) Anyway, we’re having the ceremony and reception at his aunt’s place in the country–the rolling green hills and scattered trees make me feel like I’ve stepped into a Jane Austen novel, its absolutely beautiful.
His other aunt actually runs her own little cake business out of her home, so she’s making our cake for us–her cakes are so delicious with her recipe for butter cream frosting–none of that nasty whipped frosting for me, thank you! We got a fantastic deal on carnations and snapdragons from Sam’s club: 300 carnations for 156$ and 100 snapdragons for 89$ (I love arranging flowers and am so excited I get to do this for my wedding!) A shout-out to one of the best bargain stores online for everything crafty – http://www.save-on-crafts.com – We got 1200 preserved flower petals for 40$ and a 50 yd bolt of 108″ wide bridal tulle for 45$. We’re also getting a great deal on photography, paying 300$ for the ceremony and reception photos–it helps to have a bunch of talented friends in graphic design, we’re friends with this adorable graphic design couple who are very interested in wedding photography (and they’re getting married a month after we are!). Everything else is just kind of falling into place in a simple, stress-free way. Which is exactly as it should be 🙂 I actually think its kind of funny because throughout the little amount of planning that we’ve had to do, its the friends and close family around us that are stressing out about whether or not Jeff and I have taken care of everything–there’s really not that much to take care of at all. As long as we’ve got the officiant and marriage license, we could have tornadoes wreaking havoc around us, earthquakes, thunderstorms and a flood! I could not care one bit, as long as I am able to marry my Jefferson.
Anyway, on to the part that you’ll probably be more interested in. Yes, it is has been maybe three months since I’ve had any time to post updates and progress on my projects, but I was a little busy learning, memorizing, and staging one of the most difficult roles in opera for a Mezzo-Soprano; Jo in Mark Adamo’s Little Women. And then after that, I had three weeks to learn and memorize the music for my recital (which was last Tuesday and it went beautifully, if you’d like to see/hear my performances, I’m working on putting some stuff on YouTube). So yes, this will be a rather long update!
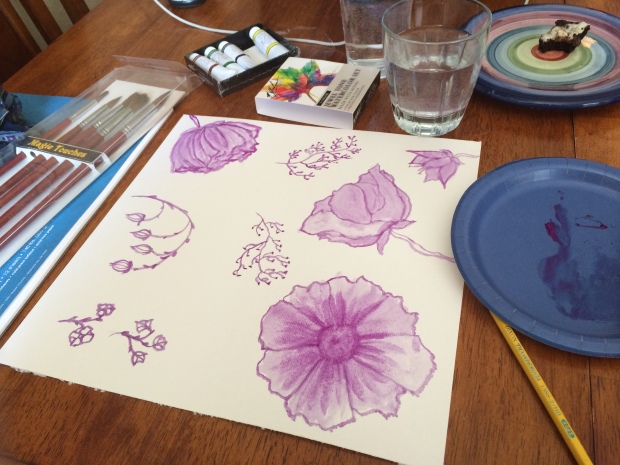
First, I would like to share the designs I created for the wedding invitations. I did all of the water color and script, then Jeff and I did the layout in Photoshop, and they have turned out just lovely!
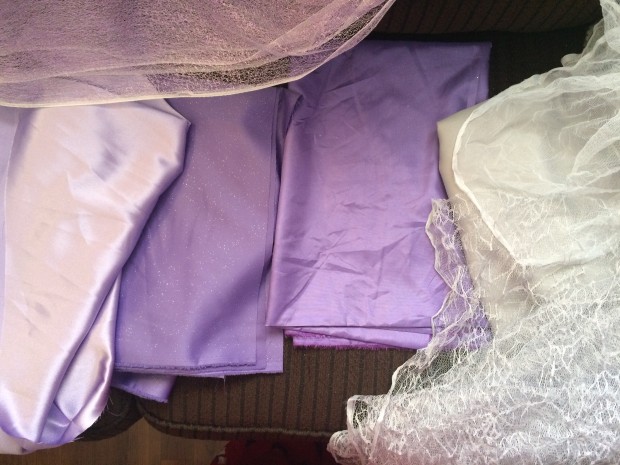
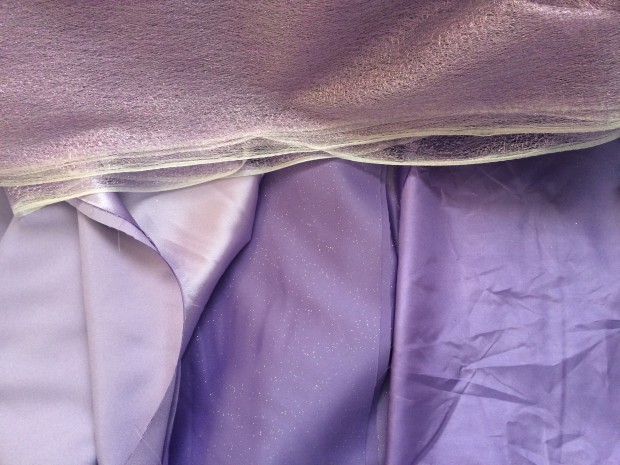
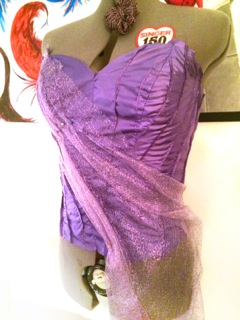
During spring break, I was able to purchase the fabric for my bridesmaids and begin work on my sister’s corset. So far everything looks splendid! I’m going for a sort of ‘realistic’ fairytale sans fairy wings (although there will be fairy dust on the cake and possibly iridescent butterflies). My friends and I went to Joann’s (they have a much wider selection than Hancock’s, though I still wish I had access to a fabric district that included something other than quilting fabric), and we found a few different fantastic purples, along with some of the prettiest crushed tulle I’ve ever seen. There was also a gray cobweb tulle that I think will add a nice touch–don’t be alarmed, you’d only be able to see the cobwebs if it were stretched, and either way cobwebs add an otherworldly finish to things! We also found the loveliest shimmering pink twiggy fabric that I’ll be able to do all sorts of things with.
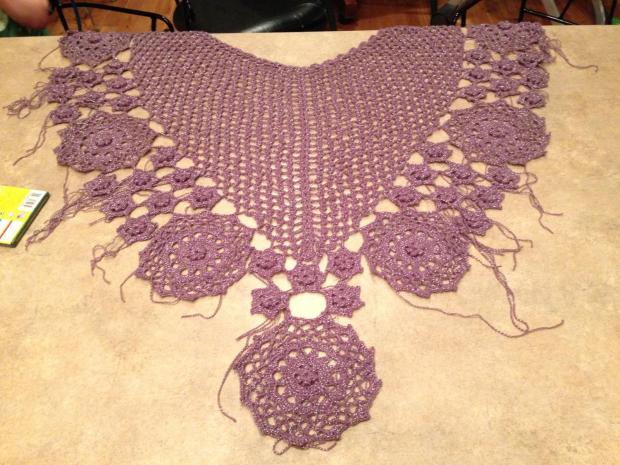
Coming from a rather crafty family, my sister is a knitting/quilting/crocheting/sewing goddess with two kids, and she is miraculously able to finish projects in a very small amount of time. So, being the best sister ever (and matron of honor), she offered to make these incredibly beautiful knitted shawls for each of the bridesmaids. We picked out this dusty lavender yarn with silver threading that matches the yarn for my wedding shawl exactly (a shawl which she, of course, made). With a bit of help from my mom, who might as well be named the ‘Queen of all Crafts’, she was able to create three of these whimsical, simply exquisite lavender shawls.
The color in this photo is a bit off, but up above there’s a sample of the yarn with the rest of the fabrics and I think it looks just about perfect 🙂 Yes, I am very happy with how everything is turning out. Only two weeks to go until the best day in the world!
Coming Up Next: The Scarlet Gown
The Wedding
Hello all! I realize it has been a few months since I’ve had any projects to put up, but as I have been (and will continue to be) rather busy with the opera, my recital and the rest of my school work, I do not have much time to begin anything new and exciting. However, the wedding is quickly approaching and though I have most of the details worked out I still have a lot of work to do. I’ve decided to post some of the projects involved with the wedding here as most everything will by hand crafted by myself, Jeff and a few others. Project number one will be the wedding invitations, which will be designed by Jeff and I. Project number two will begin as soon as my performance as Jo is finished up on March 8. I’ve decided to design and make my own bridesmaid dresses because I can’t seem to find anything ‘whimsical’ enough for my taste. If one were to narrow down my ‘colors’ for the wedding, one could say I’ve decided to go with a grey and dusty lavender. However, I must have hints of plum, blush pink and spring green as well; numerous shades of Spring.
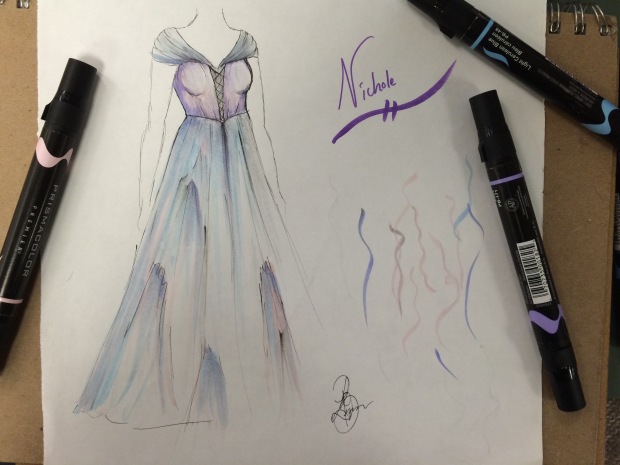
Anyway, here are the concept designs of each dress, the first belongs to my sister, the maid of honor.
Masquerade Gown Part 5: The Finished Product
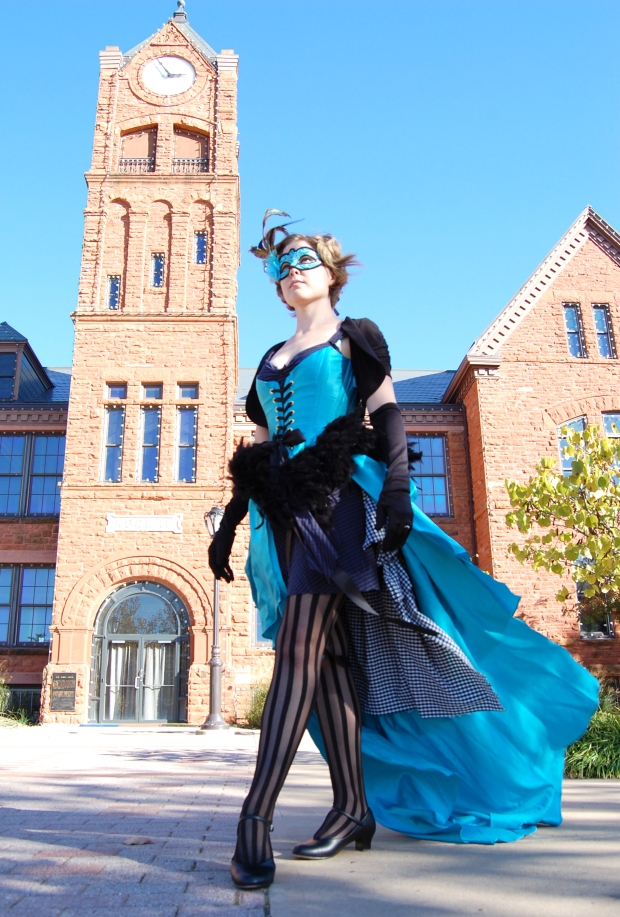
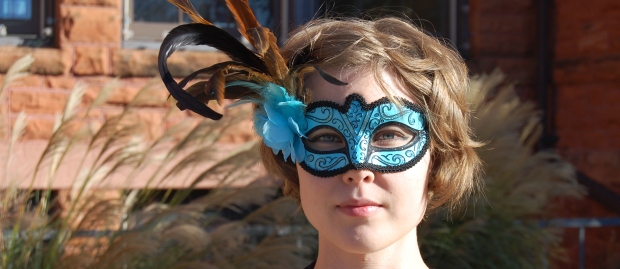
Hello! I know it has been a few weeks since I’ve updated, but I’m immersed in projects and music in preparation for finals and juries. Also, I have some very exciting news. On Halloween night, with me in my robin egg blue masquerade gown running around on the stage of an outdoor theater surrounded by water and city lights, calling, “Jeff! Look! My dress flies out behind me when I run, like a cape! Mwahahaha!” my boyfriend of two years asked me to marry him. He picked the ring out all by himself! (which is good, because I know absolutely nothing about jewelry, I just told him I wanted something sparkly and white gold, but nothing huge and gawdy)
Also, he’s like 6’4″ soooo…. the camera had kind of a hard time capturing his full form in that tiny room.
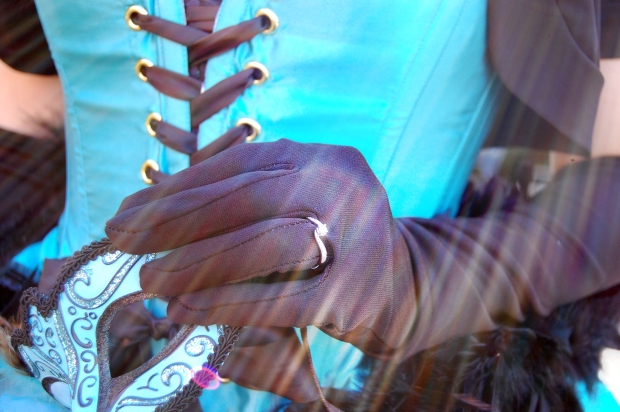
And here’s a closer picture of the ring! 😀 Isn’t it just lovely?
I really love how the skirt turned out in the photos, it looks kind of like water.
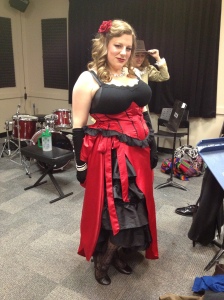
Since Donna Ribalda in Stoned Guest is supposed to be an opera singer with no career, we decided to take off the feathers to make it less… ‘flamboyant’. I actually liked it a lot better because you could see more of the corset. I didn’t get to do a photo of Carmen Ghia’s costume, but here are a few of the front and back, along with a couple of from the show (horrid quality, iPhone pictures–So yes, my costumes were requested and used in UCO’s Opera Scenes “Outlaws and Villains”. The lifestream version of The Stoned Guest; a half-act opera can be found here: http://www.ustream.tv/recorded/55426485 , at 1:43:21 hours/minutes in)
Carmen Ghia, the Prima Donna (also kind of a slut) is choked to death by Donna Ribalda (the jealous, unsuccessful opera singer). Don Octave, Donna Ribalda’s brother, then tries to stab Donna Ribalda in a vengeful rage but sadly fails and stabs himself instead. Donna Ribalda, feeling pretty proud of herself begins to walk away and is then shot by The Stoned Guest.

